Physical Address
304 North Cardinal St.
Dorchester Center, MA 02124
Physical Address
304 North Cardinal St.
Dorchester Center, MA 02124
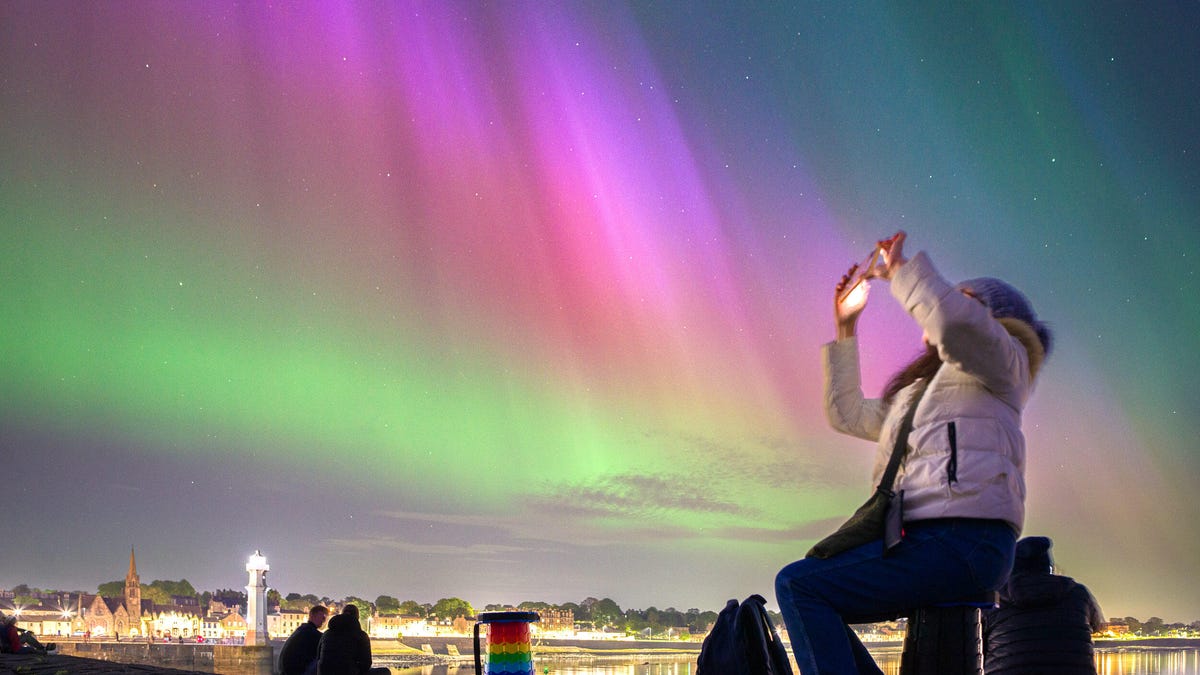
The northern lights – or aurora borealis, to use the more technical name – are a stunning phenomenon that fills our skies with countless hues of pinks and greens. It is most often seen in northern regions such as Iceland, Alaska or Norway during the winter months, but in recent years the aurora borealis has become clearly visible. Across much of the United States And Europe, where the CNET team got some great scenes in Missouri, Kansas and New York. I myself had a great time photographing the Northern Lights when they were on display in Edinburgh, Scotland.
The Northern Lights can be a beautiful sight to capture on camera, and it’s possible to get amazing photos using just your phone phone Without additional equipment. I was Professional photographer For over a decade I’ve photographed the Northern Lights all over the world, so I’ve put together my best tips for taking your best ever photos of the northern lights.
The most modern Camera phones It has very capable night modes that allow it to take bright photos even when it’s dark outside. On most iPhonethis mode will turn on automatically when it detects that there is not enough light (you will see a small moon icon that lights up in yellow), while some Android phones It may require you to shoot using a specific night shooting mode that needs to be activated manually. Not sure how your phone’s night mode works? Google the model and “Night Mode” beforehand to check how to do this.
Most modern camera phones will have some sort of night mode built in.
With Night Mode activated, you should be able to tap the screen to adjust the exposure, snap the photo, and watch your phone capture a long exposure that highlights the beauty of the aurora borealis with minimal effort on your part. But there’s a lot you can do to make those photos even better.
Read more: Take your best night mode photos with any phone
First, although you don’t need a tripod when using the phone, keeping your hand steady will definitely help. Try to lean against a wall or at least support yourself by bending your elbows and try to maintain a strong core while taking the photo. Holding your breath can also help.
Stick with the main image sensor, as that’s almost certainly how your phone takes the best photos. Ultra-wide lenses may allow you to capture a larger portion of the night sky, but these cameras will typically use smaller image sensors and narrower apertures, which won’t help your images. Most “standard” lenses on smartphones are around 24mm, which should be enough to take a nice photo.
If you’re shooting with a recent iPhone, take your photo using Apple’s ProRaw format. This saves more image data, while providing more control to adjust white and color balance using Apple’s built-in editing tools or in apps like Snapseed or Adobe Lightroom. Most Android phones offer some type of raw photography in DNG format, and I highly recommend using this.
I took this photo with my Leica camera during my recent trip to Sweden. I placed it on a tripod, used a wide aperture and a 3-second shutter speed. I used snowmobiles as interest in the foreground.
Changing the white balance in an aurora photo is often crucial, especially if you’re shooting near urban areas where the orange glow of street lights can throw off your phone’s camera. By shooting raw, you can adjust the colors, along with exposure and contrast to allow the twilight colors to really pop.
Using a regular DSLR or mirrorless camera is the best way to take pictures of the northern lights. These cameras have much larger image sensors and larger lens apertures to capture more light than your phone can. However, you will need some additional equipment.
First, you’ll absolutely need a tripod. Aurora images are usually taken over several seconds, so keeping your camera steady during that period is crucial. If your camera has interchangeable lenses, choose something around 20mm to capture a wider scene. A wider aperture is better here – at least f/2.8, although a fast prime lens that offers f/1.8 is better. The wider the opening, the more light it can allow to enter.
I find it’s best to manually control the camera when photographing the aurora borealis since changing light levels can throw off any automatic or aperture priority modes. These are the exposure settings you need to take into consideration:
I was thrilled to see this amazing view of the Northern Lights during a trip to Iceland. I placed the camera on a tripod and used a long exposure to capture enough light. I used a wide lens to allow me to include the bay and mountains in the frame.
Wide opening: The widest your lens can go to let in more light. Ideally f/2.8, but f/2 or f/1.8 is best. Remember: the smaller the number, the wider the aperture.
High ISO speed: The higher the ISO value, the more sensitive the sensor is to light. ISO 800 is a good starting point, but you may find that you want to push it to ISO 1000 or beyond. The higher the ISO speed, the more image noise (digital grain), but most modern cameras (especially those with full-frame sensors) can handle high ISO speeds up to ISO 3200 very well with little or no visible noise.
Slow shutter speed: Speeds of around two seconds are a good starting point, but again, you may find that you need more light, so it may be necessary to slow down to five seconds. Remember that the aurora is moving, so if you want to capture it clearly, it is best to keep the shutter speed to a few seconds. If you instead want to fill the sky with a full wash of color (also good), you can try slower speeds of up to 30 seconds or more.
Also keep in mind that with long exposures, any camera movement will cause your photo to appear blurry, so don’t touch it while taking photos. If you don’t have a remote release cable for your camera, use a two-second timer to allow any vibrations to settle before the camera takes the picture.
Raw format: As with phones, shooting raw gives you full control to adjust white balance later in apps like Adobe Lightroom, while also providing greater range for soft shadows and backlight clouds. Raw on-camera shooting is essential here.
Shooting vertically allows you to capture more of the night sky as well as more of the foreground.
Although having the right kit and sorting out your settings will help your aurora photos turn out well, there’s a lot you can do to elevate your photos from simple “oh, nice” shots to “oh wow!” Art pieces.
First, consider your location. Shooting from your bedroom window may be convenient, but there’s probably somewhere nearby you can go quickly to get a better vantage point. If you’re expecting the aurora borealis that evening, try planning a trip outside the city away from light pollution so those colors can shine even brighter.
Read more: The best tripod for photography in 2026
Remember to focus on your composition. Sure, pointing your camera straight up to capture a photo of the aurora in the sky is fine, but think about how you can use the landscape in front of you as part of the composition. There may be mountains, rivers, lakes or coastal bays that look stunning with the sparkle of the Northern Lights above.
Maybe you are in the city, far away from this beautiful landscape. Don’t worry — you can instead focus on bringing the buildings into the equation, and perhaps finding a vantage point overlooking the city that allows you to capture the light show above. It’s worth keeping some ideas in mind, so if you’re keen to capture the Northern Lights, it’s worth Googling some images and seeing if they will help inspire your own shots.
Finally, don’t forget about editing. The editing stage can transform your aurora images. Those who shoot in raw format will already need to adjust the white balance of your images, but any shot will benefit from some basic adjustments. In my own photos, I often increase the exposure a bit, increase the contrast, and even add some sharpening to help really bring out the details of the aurora.
Increasing the saturation is a no-brainer (we really want those colors to pop!) and adjusting the crop to remove any unwanted distraction can also be helpful. There’s no right or wrong way to edit your photos, so it’s worth spending some time playing around with the sliders.
