Physical Address
304 North Cardinal St.
Dorchester Center, MA 02124
Physical Address
304 North Cardinal St.
Dorchester Center, MA 02124
3D printing isn’t just for fun. I’ve been using it for years to make useful tools and accessories. I’ve printed more cartoons and doodles for use in my home than I can count, but these are my favorites: starting with a Dyson tool holder, including phone holders, and a custom cookie cutter modeled after my dog, Jasper.
All of the 3D prints we have featured can be printed using any 3D printer, including Our top pick is the $280 Bambu Labs A1. I printed my versions onto a file Prusa Mini Plus.
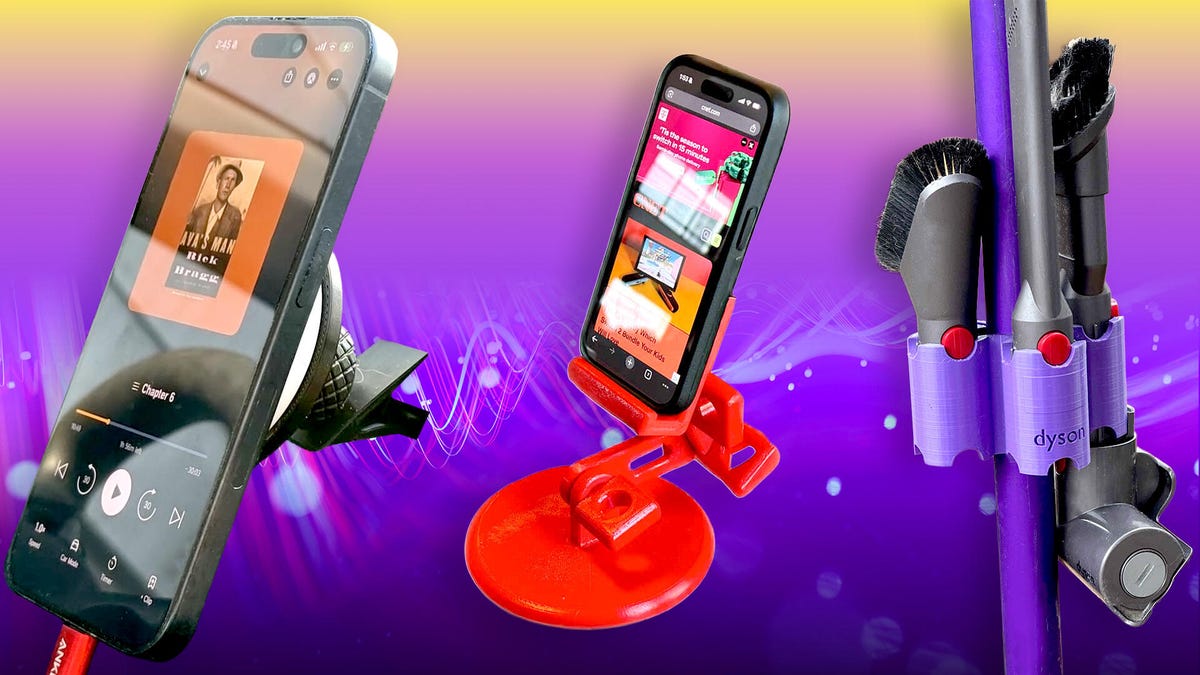
Dyson vacuums are great, but they come with a lot of accessories that I keep losing. This simple 3D printed tool holder attaches to my vacuum so I never lose things.
I love my country Dyson vacuum: It absorbs in the best way possible and has plenty of cleaning heads for a variety of tasks. The included dock doesn’t have a place to store them all, so I keep misplacing them. So I printed this Dyson tool holderthat it. It holds up to six cleaning heads, placing them exactly where you need them while cleaning.
This is the tool holder that came with my Dyson machine. It works perfectly.
After 3D printing the model, I used four M3 screws to attach it to my Dyson long extension wand. It’s designed for the Dyson V11, but works well with my V8 and also holds the bulky hair tool. It should work with any Dyson cordless device that has the same diameter wand extension. The vacuum still fits into the standard charging base, making it much easier to store. If that sounds too bulky, move on Wall mounted version. Pro Tip: The best match I’ve found for the purple color of my Dyson is Polymaker Polylite PETG filament in purplewhich is similar but a little lighter.
These 3D printed blade covers help prevent your knives from becoming dull in the closet.
Throwing a good set of knives in the drawer not only makes them dull, but also protects their sharp edges. That’s simple Drawer knife holder It’s a great way to do this, as it has five knives and sharp edges down and away from prying fingers and all the other junk in the drawer. It’s designed to complement IKEA drawer dividers, but works well on its own too. I printed these with mint green PLA filament from Polymaker. This attractive, easy-to-print wick is strong enough for everyday use yet flexible enough to hold knives of varying thicknesses.
The 3D model of my dog, Jasper, served as the basis for the cookie cutter.
Want to create your own custom cookies? A 3D printer with an apt name Cookie cad designer or CookieAI It can do just that. You upload an image or text, and it creates a 3D printable design. You’ll have to subscribe to get more options than just a basic cookie cutter, but it might be worth it if you’re a big-time home baker. You can create simple piece designs for free, like I did.
I made Jasper Dog cookies using the photo tools in Apple Photos to cut out my dog Jasper from a photo, then uploaded them to CookieAI. After a minute or so, I had a 3D design of the cutter, sent it to my 3D printer and printed it with PLA. A little cookie dough rolling and sealing later, and I had these cute Jasper Dog cookies ready to bake!
Jasper has quite a handsome silhouette.
These cookie making apps can be a little picky about the image. You want a simple, bold photo with minimal details, such as a silhouette or a head-and-shoulders shot. I was lucky with my image – Jasper has a very distinct profile, which I transformed into a silhouette, creating a distinctive cookie shape. I make Dog treats With this cookie cutter to give to his friends.
Jasper makes an excellent cake.
One thing to note here: 3D printing materials are not food safe, so never use them directly with any food, as they can leach microplastics and harbor bacteria. What I did was place saran wrap over the cookie dough after rolling it out, then use the cutter through it, gently pressing to keep the wrap intact. Next, I removed the wrapper and used a sharp, clean knife to cut off any cookies that didn’t separate.
You can 3D print all kinds of storage options.
Gridfinity It is an open source standard for storage boxes, modular drawers, desk organizers, and many other cool things to help you organize things. The cool part is that everything works together because it’s based on the same standard network system. So, all these models will fit the same Baseboard A system that can be stored in a drawer, mounted on a wall, or placed almost anywhere. You can also put magnets in it to hold the containers in place. My favorite design so far is Bookfinity – book-like containers with a title on the back that shows what’s inside.
Pull out a book and open it. It has dedicated compartments for screws, nails, washers, first aid supplies, and anything else you want to organize. Can’t find the design you want? Customize your own. You can change text, add logos, adjust the size of the book, and then drop in any holder, container, or other Gridfinity parts you want to use. I wasn’t able to print the multi-color version (my multi-color printer isn’t working at the moment), but I was able to print a monochrome version that worked perfectly.
You are not limited to just regular stands. I also 3D printed a car air vent holder.
You can never be too rich, too handsome, or have too much stuff to hold your cell phone. I have two 3D-printed favorites – one that’s adjustable for use at home and one that clips onto my car’s vent.
Around the house, I love this Pork3D Printed Adjustable Standwhich is easy to print, assemble and adjust, using 3D printed screws that hold the arms in place. You can also route the power cable through the latch handles to keep it out of the way. I initially 3D printed it in orange PLA, but later decided it needed a nice fire engine red color. So, I drew it using Krylon Fusion plastic spray paintwhich was well associated with the People’s Liberation Army. Pro Tip: Spraying paint like this (or clear spray paint) is an excellent way to give a smooth, clean finish to your 3D print, and it’s also less finicky and dangerous than using something like this. Plastic welding Or acetone.
My personal choice for mounting my phone in the car is This car mount is from SethMoser. I like it because it’s simple, flexible and it just works. After printing the vent-mounted version in black PLA, I assembled it by inserting two ring spacers into the nut and inserting the ball mount. Fast development of the loop, and it was safe. Next, I attached the MagSafe charging pad to the front using an adhesive pad, then tucked the cable away and plugged it into my car’s USB port. It held my iPhone perfectly, putting it within glance distance for driving without distraction. It was produced by SethMoser Another simpler versionBut I prefer the flexibility of the first.
As a tech writer, I need a lot of phone holders. 3D printing seemed like a no-brainer.
Want something really unique to hang in the winter? What about Unique 3D printed snowflakes? This template uses the Makerworld customizer to create one-of-a-kind snowflakes – just press the customizer button, enter a random five-digit number, and it will create a unique snowflake. You can change the size, number of arms, other details, and even make sure the design includes a place to hang it from a hook.
Well, the mathematicians among you have discovered something about a “singularity.” The seed that makes a snowflake is a number from one to 999,999, so there are about a million possible variables. And that’s before you include the number of arms and branch level, which controls the complexity of the chip. In any case, it’s unlikely that someone will print the same snowflake that you did, with all the social anxiety a holiday party might cause.
My 3D printer can make amazingly detailed items, including the 3D printed snowflakes that I use as decorations during the holidays.
When you find a design you like, click Download in the top right corner to print it yourself. If you have a Bambu Labs printer, you can go straight from there to printing: just choose your printer from the list, and it will send it directly to your printer. If you have another brand of printer, simply select any printer from the list, then press the arrow next to the big download button and choose the STL file. You can then load the downloaded STL model into your printer’s slicing software and print.
I’ve found the best results from setting the thickness to around 3 or 4mm and using a 0.2mm thick layer, as this gives the snowflake a little more strength. Print them too thin, and the edges tend to separate when you lift them from the print bed.
Real snowflakes usually have six arms because… Crystalline properties of waterBut if you want to confuse people, set your arms to five or seven and see if they can figure out what’s wrong with them.
These are just five of the examples I use in my daily life, but there are many more functional 3D prints you can make.
